

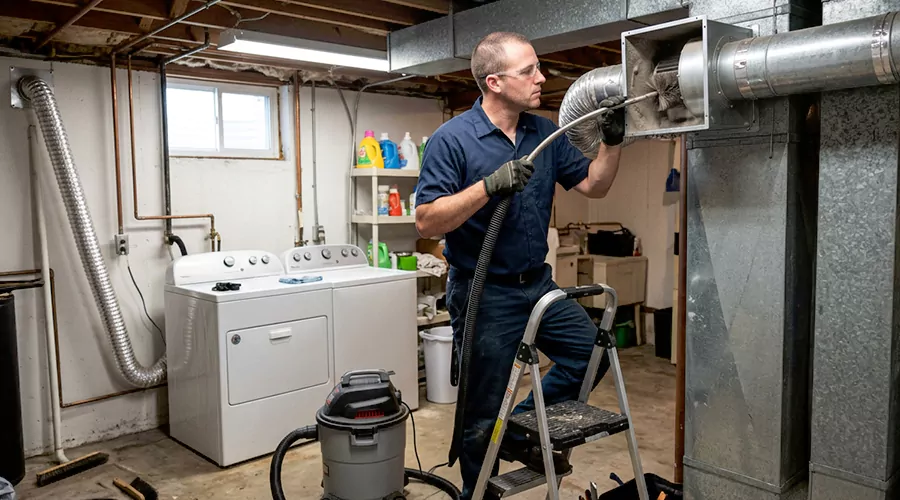
HVAC mold cleaning involves inspecting contaminated components, correcting moisture problems and removing mold from materials that can be safely restored. The process may include cleaning metal air ducts and affected air handler components. Wet or moldy fiberglass insulation generally requires replacement rather than cleaning. In 2026, residential air duct mold remediation commonly costs $600 to $2,000 for localized projects.
Mold develops inside HVAC systems when moisture remains on surfaces that contain dust or other suitable nutrients. Condensation near cooling equipment and water entering through damaged duct connections are common sources. When contamination is confirmed, the cleaning process must address both the visible growth and the conditions that allowed it to develop.
HVAC mold remediation is different from ordinary air duct cleaning because the work may involve contaminated insulation or water-damaged components. A surface that looks clean after treatment is not necessarily free of the conditions that caused the problem. Understanding the process helps homeowners recognize which steps are necessary and what results to expect.
What Is Included in HVAC Mold Cleaning?
HVAC mold cleaning includes identifying affected equipment and determining whether contaminated materials can be cleaned or must be replaced. The work generally begins with a moisture investigation and an inspection of relevant system components. Cleaning methods depend on the extent of confirmed growth and the construction of the affected materials.
Inspection of HVAC Components
An inspection establishes where suspected mold is present and whether moisture is affecting other parts of the system. The air handler and nearby duct connections may require examination because condensation and drainage problems often occur around cooling equipment. Inspecting only the visible vent covers may overlook contamination deeper inside the system.
The technician should document affected components and distinguish actual suspected growth from ordinary dust. Dark deposits on grilles do not automatically confirm mold contamination. When identification remains uncertain and the result would change the cleanup plan, additional assessment or laboratory analysis may be appropriate.
Identification of the Moisture Source
The moisture source must be identified before cleaning begins because mold can return when damp conditions continue. Common causes include clogged condensate drains and water leaks affecting duct insulation. High indoor humidity may also contribute to condensation on cold HVAC surfaces.
The investigation should determine whether the problem originates inside the HVAC equipment or from another part of the building. For example, contamination near a cooling coil may be linked to drainage problems. Mold in insulation above a ceiling may instead result from a roof leak that has affected nearby ductwork.
Removal of Mold From Suitable Surfaces
Confirmed mold on sound bare metal surfaces may be removed using methods that physically collect the contaminated material. The purpose is to remove growth and related deposits without releasing particles into occupied rooms. Cleaning may involve specialized collection equipment and suitable agitation tools.
The method must be compatible with the affected surface because HVAC components are not all constructed the same way. Bare metal ducts are generally more suitable for cleaning than porous fiberglass liners. Cleaning the wrong material aggressively can damage the duct and create additional debris.
Replacement of Damaged Materials
Some contaminated HVAC materials cannot be restored through cleaning. Wet or moldy fiberglass duct board and internal fiberglass liners generally require removal and replacement. Mold can develop within porous structures where ordinary surface cleaning cannot reliably reach it.
Replacement is also necessary when duct materials are severely damaged by water or have deteriorated beyond repair. The amount removed should reflect the documented contamination rather than assuming the entire system needs replacement. Correcting the moisture source before installing new material helps prevent repeated damage.
How Does the HVAC Mold Cleaning Process Work?
The cleaning process follows a sequence designed to identify contamination and prevent additional exposure during removal. Each stage addresses a different part of the problem, beginning with inspection and ending with verification. The exact procedure depends on whether mold affects accessible metal surfaces or porous components that require replacement.
Step 1. Inspect the Entire Affected HVAC System
The first step is examining the HVAC components connected to the suspected contamination. This may include the air handler and affected supply or return ducts. Inspecting connected components helps determine whether contamination is localized or extends through other areas of the system.
The condition of the cooling coil and condensate drainage system is particularly important when moisture is present. The inspection should identify wet insulation and water-damaged surfaces that cannot be adequately restored. Photographs can document the initial condition and support decisions about which components require work.
Step 2. Correct Condensation or Water Problems
Any ongoing water problem must be corrected before the remediation can remain effective. A blocked condensate drain may require clearing, while damaged insulation may need to be repaired or replaced. Water entering through a roof or plumbing leak must also be stopped.
Mold may begin developing on damp materials within 24 to 48 hours when conditions are suitable. For that reason, controlling moisture promptly can prevent damage from spreading to additional surfaces. Removing contamination without resolving a continuing leak leaves the system vulnerable to renewed growth.
Step 3. Protect Occupied Rooms From Contamination
Removing mold can disturb particles attached to duct surfaces or insulation. Appropriate controls are needed to prevent the material from spreading through the building. The level of protection depends on the affected area and the work being performed.
For substantial contamination, the process may involve separating the work area from occupied rooms and using suitable particle collection equipment. Workers may also need protective equipment appropriate for the task. Household fans should not be used to blow contamination out of ducts because they can distribute particles instead of collecting them.
Step 4. Clean Restorable Metal Ductwork
Sound sheet metal ducts can sometimes be cleaned when confirmed mold is limited to accessible hard surfaces. The cleaning process involves loosening and collecting contamination using tools suitable for the duct material. The objective is physical removal rather than simply changing the color of a visible deposit.
A collection system can help capture particles released during cleaning. The duct surfaces should be inspected afterward to confirm that visible contamination has been removed. Cleaning must not damage joints or create new openings that allow unfiltered air to enter the system.
Step 5. Remove Contaminated Fiberglass Materials
Internally insulated ducts require a different approach when mold develops within the insulation. The affected material may retain moisture even when its outer surface appears dry. Chemical sprays cannot reliably remove contamination embedded between fiberglass fibers.
Wet or moldy fiberglass duct material generally needs replacement. The work may involve removing an affected liner or replacing an entire contaminated section. The replacement material should be installed only after the underlying moisture problem has been corrected.
Step 6. Address Other Affected HVAC Components
Mold problems do not always remain limited to the duct passages. The air handler cabinet and cooling coil area may also contain damp deposits or affected materials. Leaving contamination in connected equipment can undermine work performed elsewhere in the system.
Cleaning or replacement decisions should reflect the construction of each component. Drain pans and other accessible nonporous surfaces may be cleaned using appropriate methods, while contaminated insulation may require removal. Restoring normal drainage is necessary when water accumulation caused the original problem.
Step 7. Inspect the Results Before Restoring Operation
The completed work should be checked to confirm that affected materials have been cleaned or replaced. Previously damp areas should be dry, and the cause of water intrusion should be resolved. Any access openings created during the work must also be properly closed.
Photographs of cleaned components can help document the results. Additional testing may be useful when uncertainty remains, but routine air sampling is not required after every remediation project. The system should return to normal operation only when the affected components are suitable for use.
Which HVAC Components May Need Mold Cleaning?
Mold contamination can affect several parts of an HVAC system because moisture conditions differ between components. Cooling equipment naturally produces condensate, while ductwork may become damp because of insulation problems or building leaks. Each affected area requires evaluation before deciding whether cleaning is suitable.
| HVAC Component | Common Moisture Concern | Possible Treatment |
|---|---|---|
| Bare metal air ducts | Damp dust or water intrusion | Controlled physical cleaning |
| Evaporator coil area | Condensation and accumulated debris | Appropriate component cleaning |
| Condensate drain pan | Standing water | Drainage correction and cleaning |
| Air handler cabinet | Water intrusion or persistent dampness | Clean suitable surfaces |
| Internal fiberglass lining | Moisture trapped in porous material | Replace affected insulation |
| Flexible insulated ducts | Wet liner or damaged insulation | Replace affected sections when necessary |
| Supply and return grilles | Surface condensation or dust | Clean suitable exterior surfaces |
Not every component in the table requires treatment during the same project. A properly conducted assessment should identify which areas are affected and document the recommended work. Cleaning unaffected components without a clear reason can increase the project cost without improving the outcome.
How Long Does HVAC Mold Cleaning Take?
HVAC mold cleaning may take several hours for a limited accessible project or multiple days when contamination extends into concealed materials. The time depends on how much ductwork is affected and whether contaminated insulation requires replacement. Correcting the water problem may also extend the overall project.
An inspection may identify a small area of growth near a drainage problem that can be addressed without major duct replacement. A different home may require access through ceilings and removal of damaged duct sections. These situations should not be expected to follow the same schedule.
| Project Scope | General Time Consideration | Main Factor |
|---|---|---|
| Initial inspection | Often completed during one visit | System size and access |
| Limited accessible cleaning | May take several hours | Amount of contaminated surface |
| Cleaning multiple HVAC components | May require a full day or longer | Component accessibility |
| Replacement of contaminated ducts | May require multiple days | Extent of removal and reinstallation |
| Major water damage restoration | Duration depends on drying and repairs | Moisture source and affected materials |
These are planning estimates rather than guaranteed completion times. A project cannot be considered finished simply because the visible cleaning work has ended. The moisture source and condition of affected materials must also be addressed.
What Are the Signs That HVAC Mold Cleaning May Be Necessary?
The presence of ordinary dust inside an HVAC system does not automatically justify mold remediation. More meaningful warning signs involve visible suspected growth or persistent moisture affecting system components. An assessment should consider several observations together rather than rely on a dark stain or musty odor alone.
Common warning signs include:
- Substantial suspected growth appears on accessible internal duct surfaces.
- Water repeatedly collects around the air handler.
- Internal duct insulation remains damp after a leak.
- A musty odor consistently occurs during HVAC operation.
- Condensation repeatedly forms around affected supply openings.
- Irregular growth appears near a cooling coil or drain pan.
- Water stains develop around multiple connected duct openings.
- A roof or plumbing leak has soaked duct materials.
- Previously cleaned growth returns in the same damp location.
- Contamination is visible in more than one moisture-affected HVAC component.
These observations help identify where a problem may exist, but appearance alone cannot confirm mold. A dark deposit may consist of ordinary particles collected along an airflow path. The presence of water damage and the condition of surrounding materials provide stronger reasons for further investigation.
Is HVAC Mold Cleaning the Same as Regular Air Duct Cleaning?
HVAC mold cleaning differs from routine air duct cleaning because it addresses confirmed or credibly suspected fungal contamination and associated moisture problems. Regular duct cleaning focuses on removing ordinary dust and debris. Mold remediation may require containment or replacement of materials that cannot be restored.
The difference becomes particularly important when contamination affects internal fiberglass insulation. Ordinary mechanical cleaning cannot reliably remove mold embedded inside porous duct material. Replacement may be necessary even when some nearby metal surfaces are suitable for cleaning.
Another difference involves moisture correction. Standard duct cleaning does not automatically include repairing condensate drainage or water-damaged insulation. Mold remediation should address those conditions because repeated dampness can allow new growth.
Does HVAC Mold Cleaning Include Chemical Fogging?
Chemical fogging is not automatically required for HVAC mold cleaning. Fogging distributes an antimicrobial mist through selected parts of a system, but it does not physically remove established mold or restore wet insulation. Product effectiveness and permitted use depend on the exact chemical and its labeling.
Physical removal remains important because dead mold material can still produce reactions in susceptible people. Simply applying a chemical without removing contaminated deposits is not equivalent to cleaning the affected surface. Chemicals also cannot repair a leaking condensate drain or damaged duct connection.
Products intended for household surfaces are not automatically approved for HVAC applications. Internal fiberglass duct materials require particular caution because antimicrobial products used on bare metal may not be suitable for porous insulation. Any proposed treatment should have a specific purpose supported by the actual condition of the system.
How Much Does HVAC Mold Cleaning Cost in 2026?
HVAC mold cleaning costs depend on the extent of contamination and whether damaged materials must be replaced. Localized mold remediation in air ducts commonly costs $600 to $2,000 in the United States during 2026. More extensive HVAC remediation can cost $3,000 to $10,000 when several components require attention.
| Service or Condition | Estimated 2026 U.S. Cost |
|---|---|
| General air duct cleaning without confirmed mold | $271 to $509 |
| Mold inspection | $303 to $1,075 |
| Localized air duct mold remediation | $600 to $2,000 |
| Extensive HVAC system mold remediation | $3,000 to $10,000 |
| Replacement of moldy duct insulation | Requires an affected-section estimate |
These figures describe different project scopes and should not be added together automatically. For example, an extensive remediation quote may already include cleaning some components and removing damaged materials. The final estimate should identify exactly which work is included.
The location of contamination has a major effect on cost. Mold on accessible bare metal is generally less difficult to address than contamination within concealed fiberglass-lined ducts. A moisture problem requiring additional building repairs may also increase expenses.
When Should You Call a Professional?
Professional assessment is appropriate when mold is suspected inside HVAC ducts or on internal equipment components. Wet fiberglass insulation and extensive water damage also require specialized evaluation. These conditions cannot be reliably addressed through ordinary household vent cleaning. Our HVAC inspection service provides the diagnostic testing needed to locate the moisture source and assess duct conditions.
A qualified HVAC technician can examine condensate drainage and identify damaged duct connections that contribute to moisture problems. A mold remediation specialist may be necessary when contamination extends into porous materials or concealed areas. The work should be planned around confirmed affected components rather than treating the entire system without evidence.
Before authorizing remediation, request documentation of the suspected growth and the materials involved. A clear work description should explain what will be cleaned and what must be replaced. It should also identify how the moisture source will be corrected.
The inspection should not rely only on a musty odor or dark deposits around a vent cover. Ordinary dust may resemble mold, and damp building materials outside the HVAC system may produce similar odors. Identifying the source prevents unnecessary work.
How Can You Prevent Mold After HVAC Cleaning?
Preventing mold after remediation requires keeping HVAC components dry and maintaining proper equipment operation. Correcting water problems is more important than repeatedly treating surfaces with chemicals. Regular maintenance can help identify condensation and drainage issues before they affect internal materials.
Maintain Condensate Drainage
Inspect accessible condensate drainage areas during normal cooling maintenance and watch for standing water or overflow. The drain system should remove moisture produced by the evaporator coil. Repeated drainage problems should be corrected before nearby insulation or building materials become wet.
Control Indoor Humidity
Use a digital hygrometer to monitor indoor relative humidity and aim for approximately 30% to 50% when practical. Excess humidity increases the likelihood of condensation on cold HVAC surfaces. Bathroom ventilation and appropriate moisture control can help reduce repeated dampness.
Maintain Duct Insulation
Inspect safely accessible ductwork for damaged insulation or disconnected connections. Ducts installed in unconditioned spaces need suitable insulation to limit condensation. Repairing exposed sections helps prevent humid air from reaching cold surfaces during cooling operation.
Replace HVAC Filters as Recommended
Check the HVAC filter approximately once a month during heavy system use and replace it according to the manufacturer's instructions. Proper filtration reduces particles collecting on downstream equipment. However, even a clean filter cannot prevent mold when water continues entering the system.
Conclusion
HVAC mold cleaning involves identifying contamination and correcting the moisture source before affected materials are cleaned or replaced. Sound metal ducts may be restorable, while wet fiberglass insulation generally requires replacement. The process should include connected HVAC components when they are affected. Chemical fogging alone cannot complete remediation. This week, inspect accessible drainage areas and check for signs of recurring moisture.